With Smallstep Certificate Manager, you can create an entirely new private PKI setup or an intermediate CA from your existing PKI by `bring your own root`. Get started now.
🔎 Looking for the open-source `step-ca` version?
This tutorial is designed specifically for Smallstep's online Certificate Manager. If you are looking for the open-source version, you can find it here.
With Smallstep Certificate Manager, you can create an entirely new private PKI setup or an intermediate CA from your existing PKI. Intermediate CAs (also called subordinate CAs) are used to sign and issue leaf certificates to subscribers. Intermediates aren't generally included in trust stores, making them easier to revoke and rotate, so certificate issuance from an intermediate typically is online and automated.
This tutorial will walk you through creating a new PKI or an intermediate CA.
Importing your Root Certificate to a new Advanced Authority
- Create a new Authority of the type, `Default Authority` below ACME and Managed Device Attestation

Name your Advanced Authority
⚠️ Be sure to change the default type from DevOps to Advanced.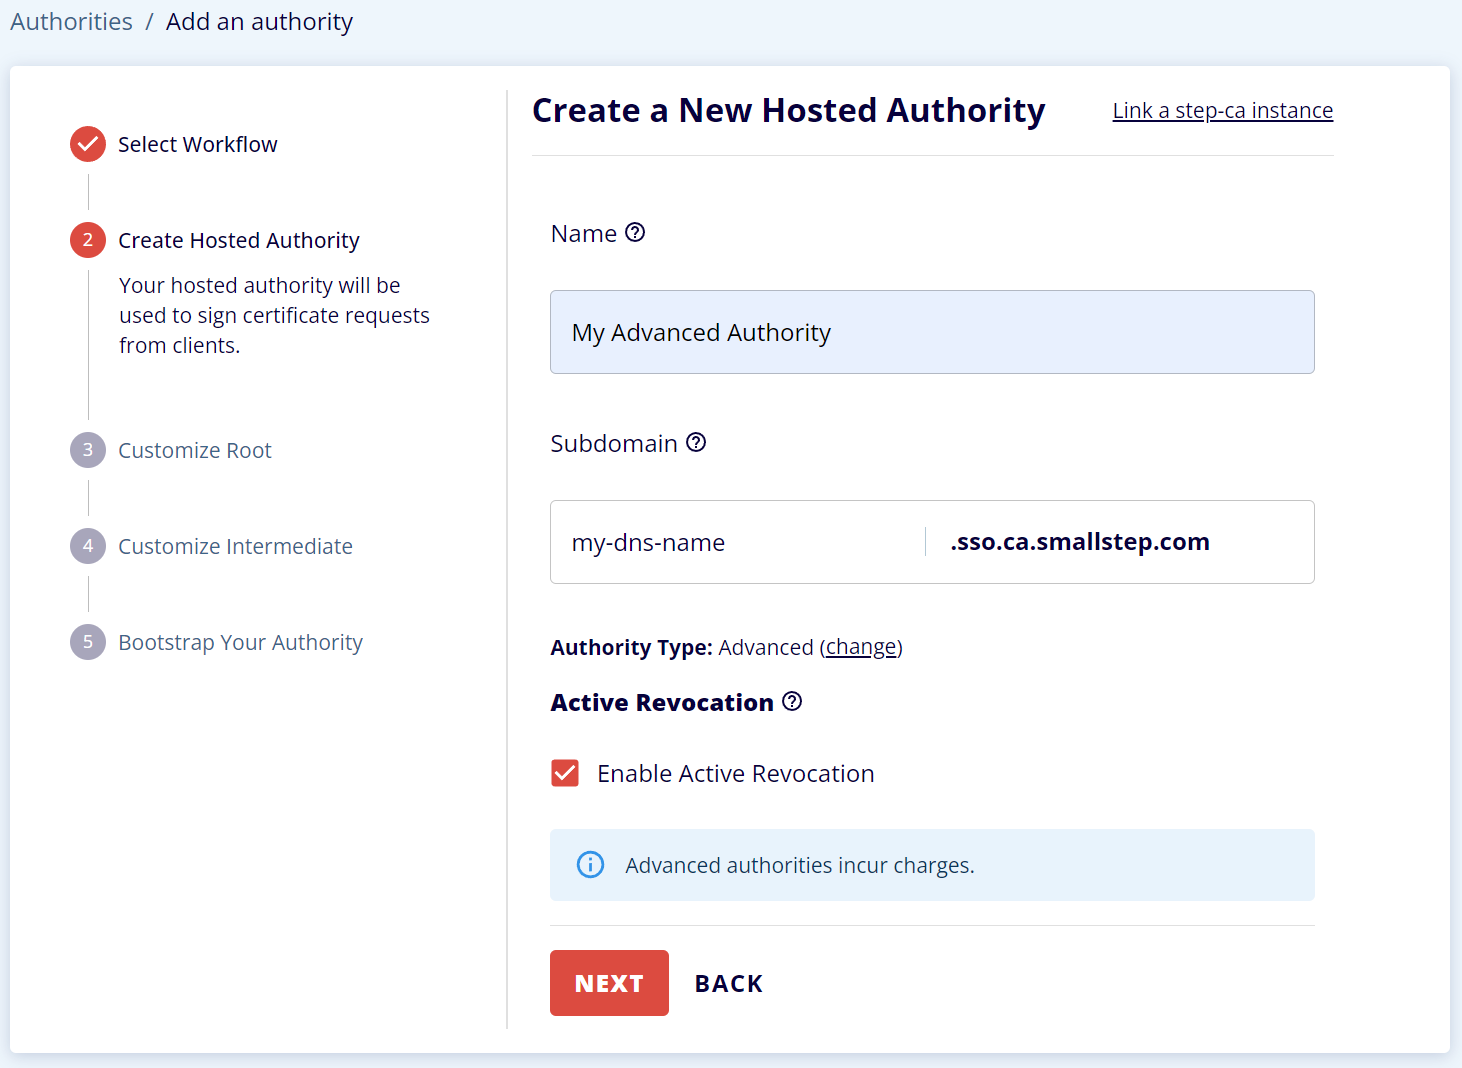
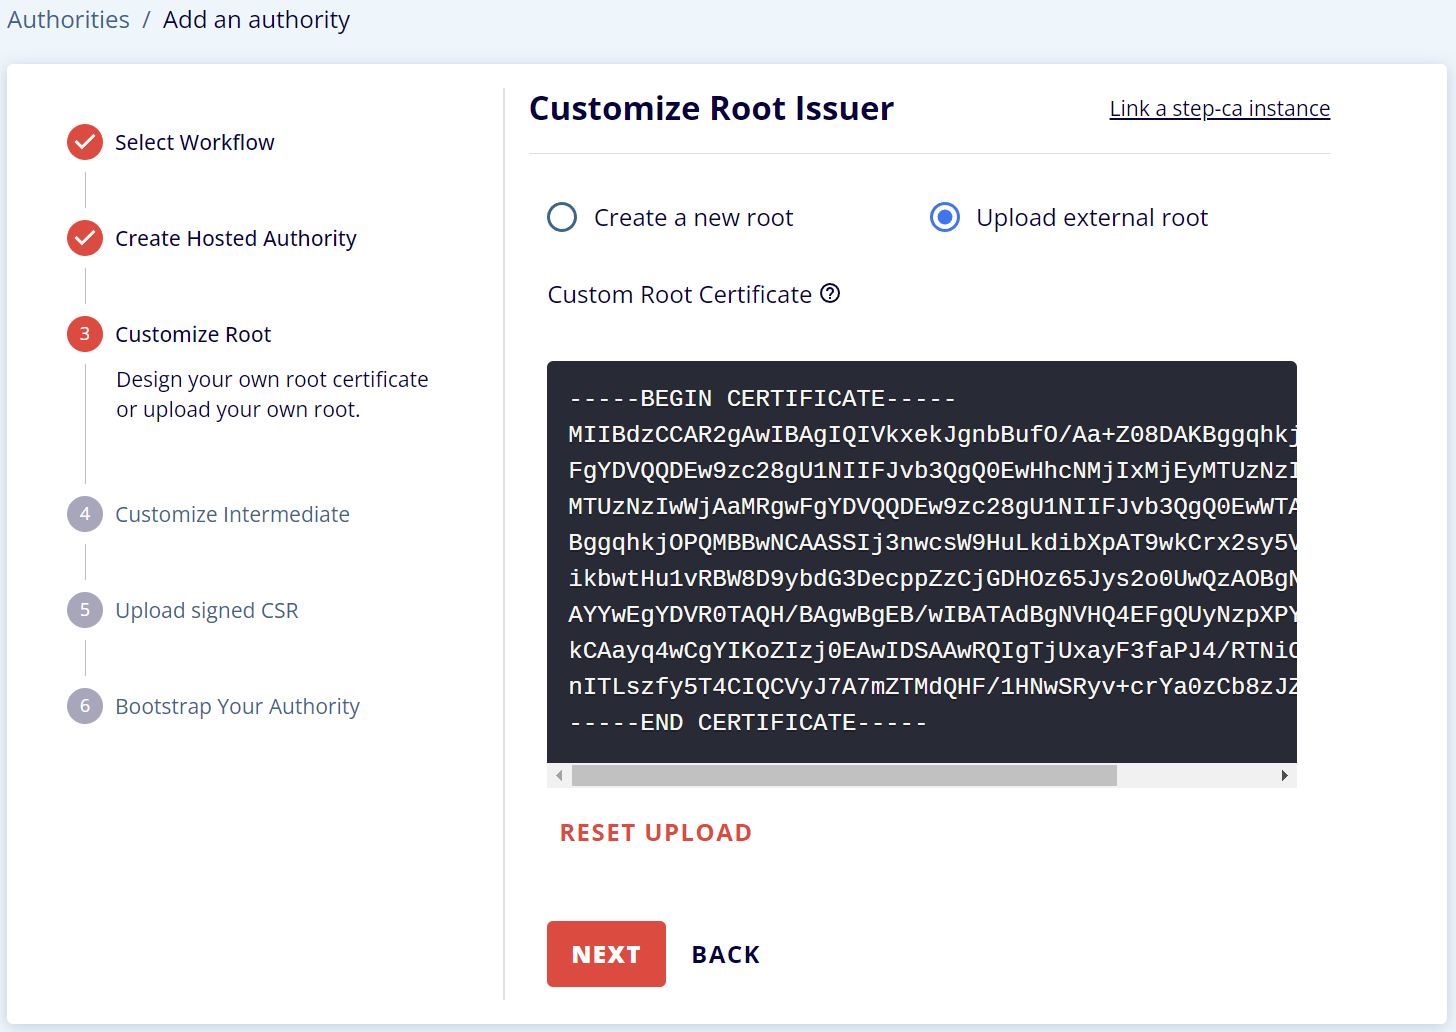
Upload your root certificate
⚠️ Your root certificate needs to be in `PEM` format. You can convert to PEM using:
step certificate format YourRootCert.der

# command reference for `step certificate format`
TRANSFER THE CSR FILE AND GET IT SIGNED.

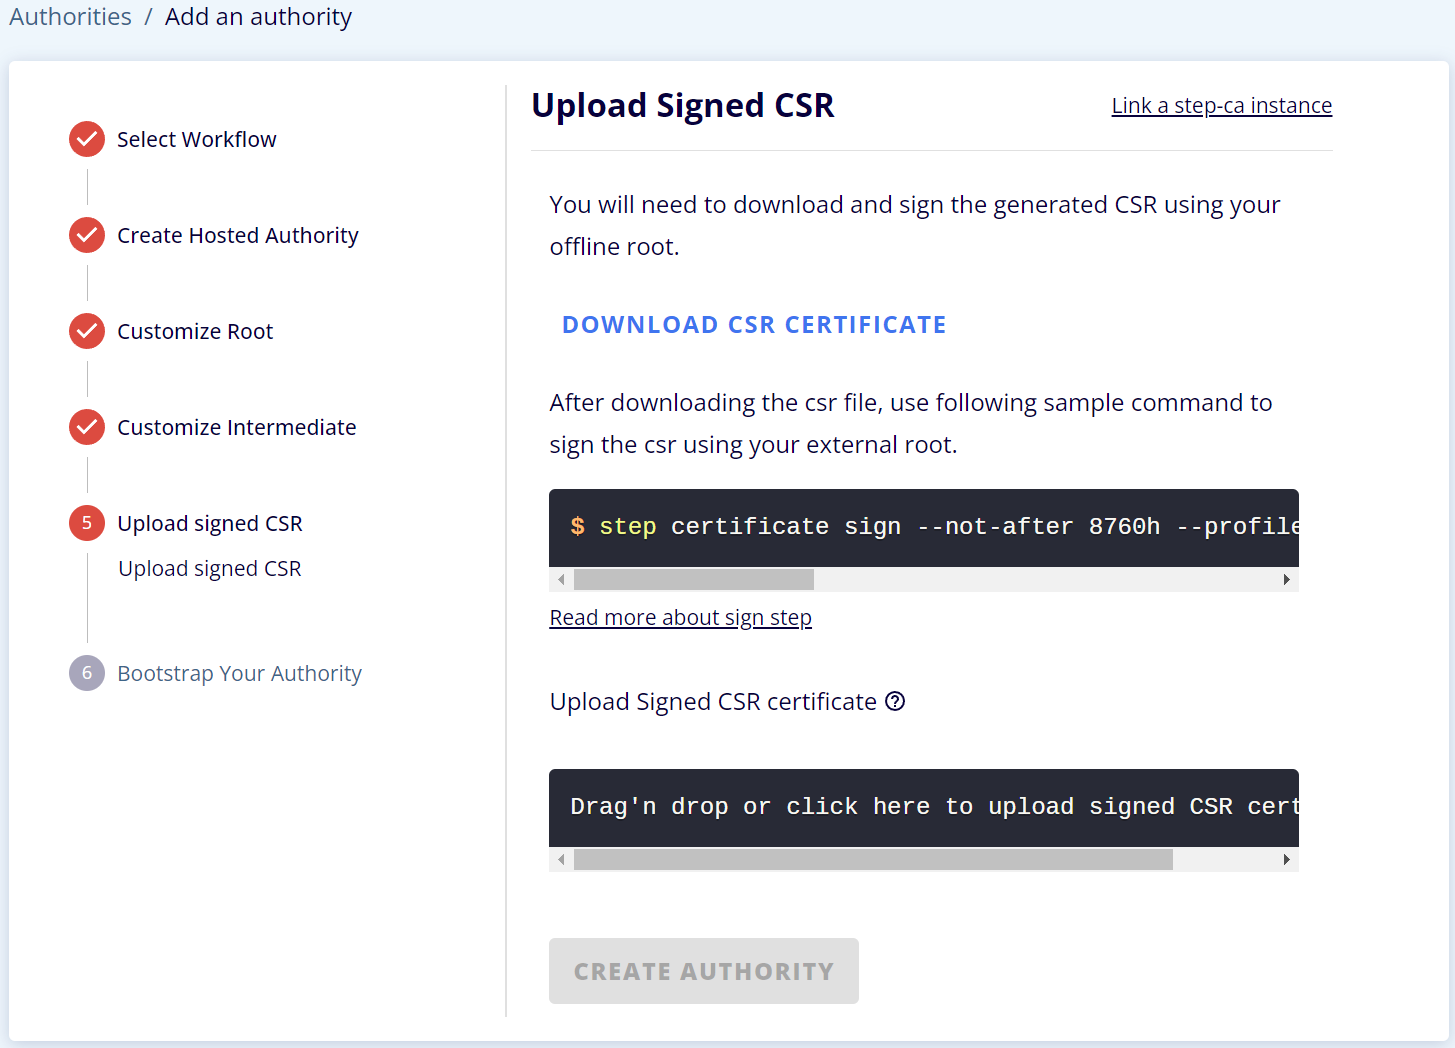
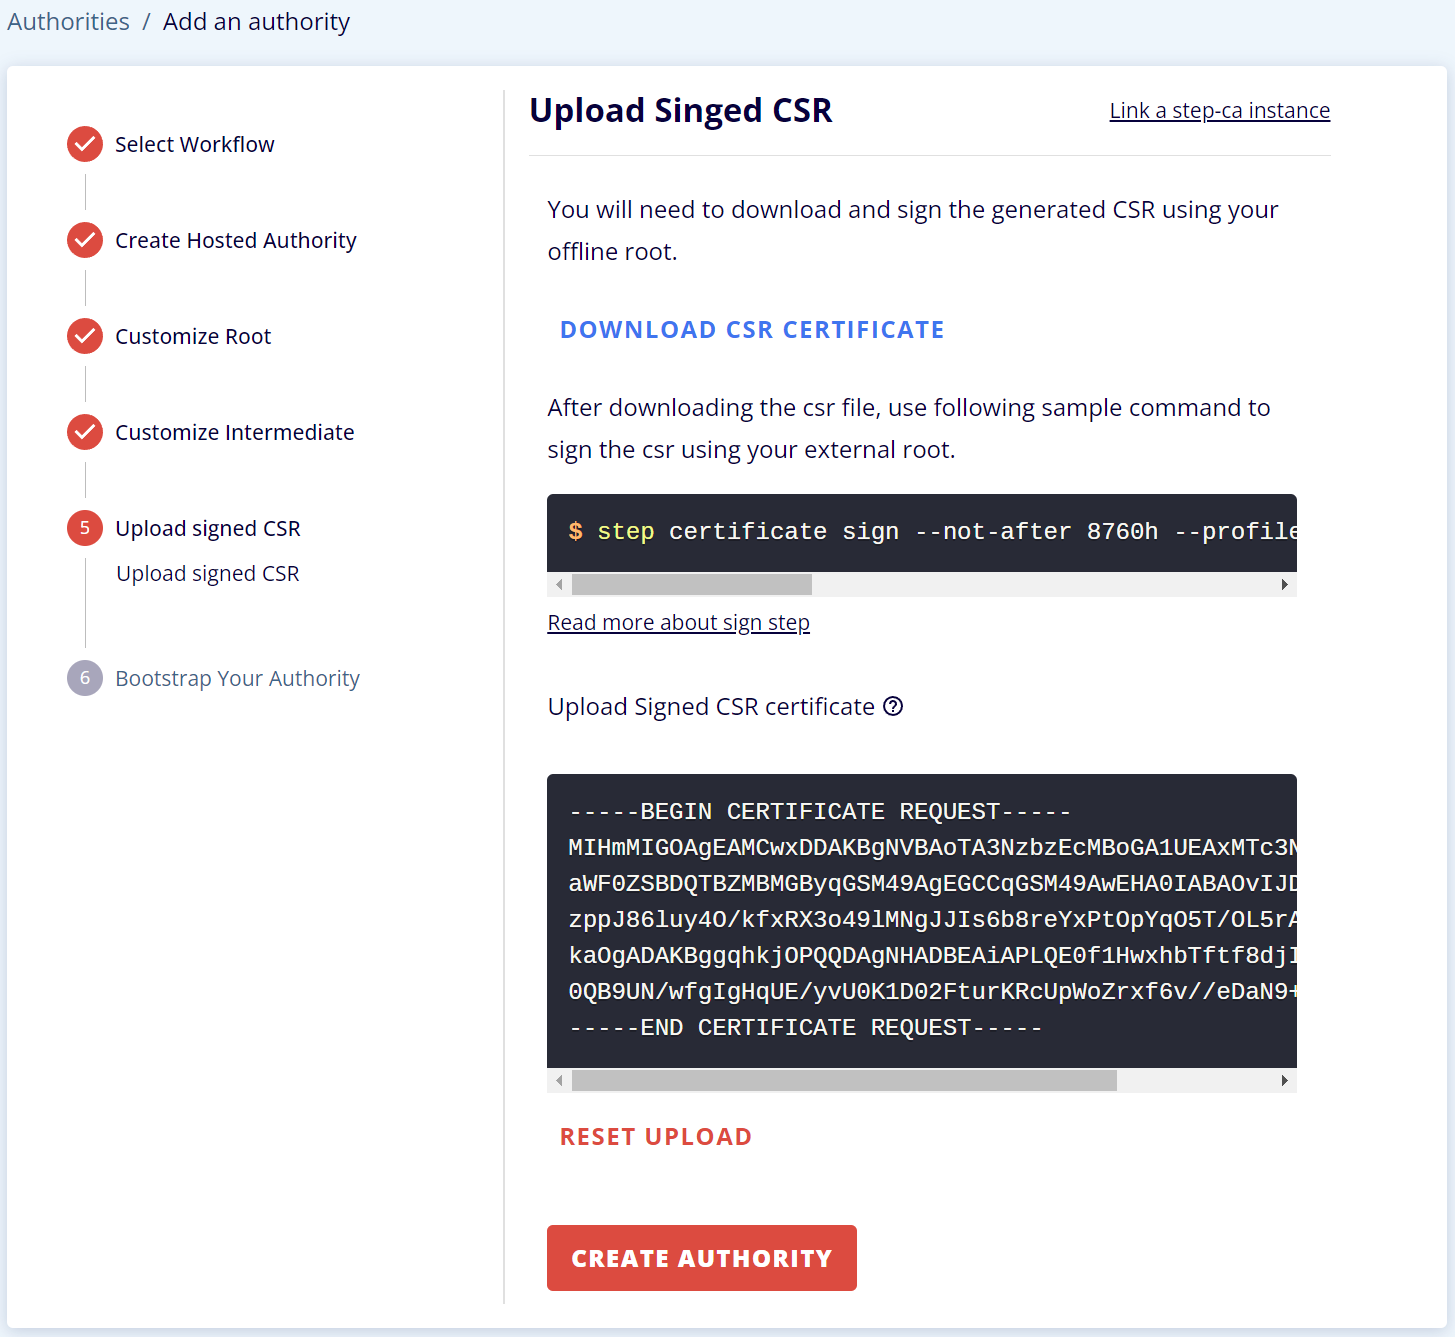
TRANSFER THE CSR FILE AND GET IT SIGNED.
Now, you will need to transfer the CSR (intermediate.csr) file to your existing root CA and get it signed. Below we have examples of how to do this using `step`, Active Directory Certificate Services, AWS Certificate Manager Private CA, OpenSSL, and CFSSL.
Use `step` to sign your intermediate CSR
step certificate sign --profile intermediate-ca intermediate.csr root.crt root.key
Active Directory Certificate Services
certreq -submit -attrib "CertificateTemplate:SubCA" intermediate.csr intermediate.crt
AWS Certificate Manager Private CA
You can now use the following Python script that uses issue-certificate to process the CSR:
import boto3
import sys

AWS_CA_ARN = '[YOUR_PRIVATE_CA_ARN]'

csr = ''.join(sys.stdin.readlines())

client = boto3.client('acm-pca')
response = client.issue_certificate(
    CertificateAuthorityArn=AWS_CA_ARN,
    Csr=csr,
    SigningAlgorithm='SHA256WITHRSA',
    TemplateArn='arn:aws:acm-pca:::template/SubordinateCACertificate_PathLen1/V1',
    Validity={
        'Value': 5,
        'Type': 'YEARS'
    }
)
print(f"Creating certificate with ARN {response['CertificateArn']}...", file=sys.stderr, end='')
waiter = client.get_waiter('certificate_issued')
waiter.wait(
    CertificateAuthorityArn=AWS_CA_ARN,
    CertificateArn=response['CertificateArn']
)
print('done.', file=sys.stderr)
response = client.get_certificate(
   CertificateArn=response['CertificateArn'],
   CertificateAuthorityArn=AWS_CA_ARN
)
print(response['Certificate'])
To run it, fill in the ARN of your CA and run:
$ python issue_certificate.py < intermediate.csr > intermediate.crt
OpenSSL
openssl ca -config [ROOT_CA_CONFIG_FILE] \
  -extensions v3_intermediate_ca \
  -days 3650 -notext -md sha512 \
  -in intermediate.csr \
  -out intermediate.crt
CFSSL
For CFSSL you'll need a signing profile that specifies a 10-year expiry:
$ cat > ca-smallstep-config.json <<EOF
{
  "signing": {
    "profiles": {
      "smallstep": {
        "expiry": "87660h",
        "usages": ["signing"]
      }
    }
  }
}
EOF
$ cfssl sign -ca ca.pem \
    -ca-key ca-key.pem \
    -config ca-smallstep-config.json \
    -profile smallstep
    -csr intermediate.csr | cfssljson -bare